Non-Playing Characters (NPCs), portrayed in the game as "Colonists" can be assigned jobs via the Command Tool or through the use of placeable job blocks. This will give them the order to engage in specific tasks in order to automate production of food, ores, tools and other significant resources to keep your colony running. Colonists must have crates to drop off their produce. Similarly, Colonists require a grocery store and a tool shop, neither of which need a worker present. Placing the crate, grocery, and tool shop closer to the colonist's job will increase the efficiency of the job, as it cuts back on time required to travel between the block and the job. Colonists who can not reach a crate, grocers, or shop (or, if you don't have any of these, the banner) will display a symbol over their head indicating that they have no viable path and will stop working until a path is created. A Colonist who cannot reach their job will also display a symbol above their head and will not move until the issue is resolved. Unemployed Colonists will still consume food at a grocers or at the banner and wander in an area around the banner until they sleep.
Job Types[]
Within Colony Survival, there are many types of jobs, with more advanced types of jobs needed to sustain more advanced colonies. Below is a list of the jobs found in the game:
Food[]
Food/calorie production is the core of any colony, as colonists need calories to survive, and the player needs calories to recruit new colonists. All food producing jobs are placed with the Command Tool except for the Fisherman, Water Gatherer, and the Waterpump Worker, who require special job blocks. Different types of food require different materials to produce, and they originate from one of the following:
 Berry Farmer - Works in a Berry Farm, and produces Berry. Wears a Red Shirt.
 Wheat Farmer - Works in a Wheat Farm, and produces wheat. Wears a Light Green Shirt.
 Water Gatherer - Works at a Water Gatherer job block, and produces water. Must be placed next to a water block.
- Waterpump Worker - Works at a Waterpump, and produces water.
- Fisherman - Works at a Fisherman job block, and produces fish. Must be placed next to a water block.
- Barley Farmer - Works in a Barley Farm, and produces barley.
- Chicken Farmer - Works in a Chicken Coop, and produces Chicken Meat and Feathers.
- Cabbage Farmer - Works in a Cabbage Field, and produces cabbage.
- Olive Farmer - Works in an Olive Farm, and produces olives. Removed as of 0.9.0
Guard[]
Guards are responsible for attacking zombies, they use various weapons and can take daytime or nighttime shifts.
Daytime Guards will sleep during the night, then wake up early to move to their post. Once there, they will stand guard, firing upon any nearby undead with their weapon until the early night (19:00 game time). Via the appropriate science, stronger weapons with longer ranges can be unlocked and crafted
Nighttime Guards will sleep during the day, then wake up as the sun begins to set to move to their post (17:00 game time). Once there, they will stand guard, firing upon any nearby undead with their weapon until the late dawn (08:00 game time), when they will leave their post and return to sleep. Via the appropriate science, stronger weapons with longer ranges can be unlocked and crafted. Below are the different types of guards. All of them have day and night variants and require the appropriate job block to work at.
| Basic Stats | Max Used per Day/Night | ||||
|---|---|---|---|---|---|
| Range | Damage | Firing Time | Damage | Ammo | |
| 12 blocks | 25 | 3 seconds | 3750 | 150 | |
| 18 blocks | 75 | 5 seconds | 6750 | 90 | |
| 25 blocks | 200 | 8 seconds | 11,250 | 56 | |
| 10 blocks | 1800 over 45 seconds | 12 seconds | 67,500 | 38 | |
| 10 blocks | 1300 | 10 seconds | 58,500 | 45 | |
| 30 blocks | 500 | 7 seconds | 32,000 | 64 | |
| 18 blocks | 250 | 12 seconds, 3 block radius | 450,000 | 38 | |
Miner[]
Miners are unique in that their workstation may only be placed on oreblocks, which is found by digging into either a mountain or down into the ground. Oreblocks can have several variants, each producing a different mineral when mined. Miners produce an infinite amount of the mineral that their workstation is on.
- Miner - Works at a Miner Job spot, produces that spots mineral indefinitely, wears a Black Shirt
Forester[]
- Foresters work an area by planting saplings and cutting them down when they grow into trees.
Flax & Herbs[]
Flax can be planted and harvested in any biome. Alkanet, Hollyhock, and Wolfsbane can only be planted on marsh dirt.
Construction[]
- Digger area
- Builder area
- Special digger area
- Construction job
First Steps[]
Some of the first essential jobs in the game are ones that produce food. Food is an essential resource in the game, and if your food reaches 0, your colonists will begin to die of starvation. The first 10 colonists are free, cost no food to hire, and add no threat to your colony, but still consume one meal everyday. A colonist can be hired from the Colony Tab, hotkey 'c' by default, and you cannot hire more colonists than you have beds available. On creation of your colony, you will start with 12 beds, 3 crates, 20 torches, 20 berry meals, and 200 planks. After that, each colonist costs four meals.
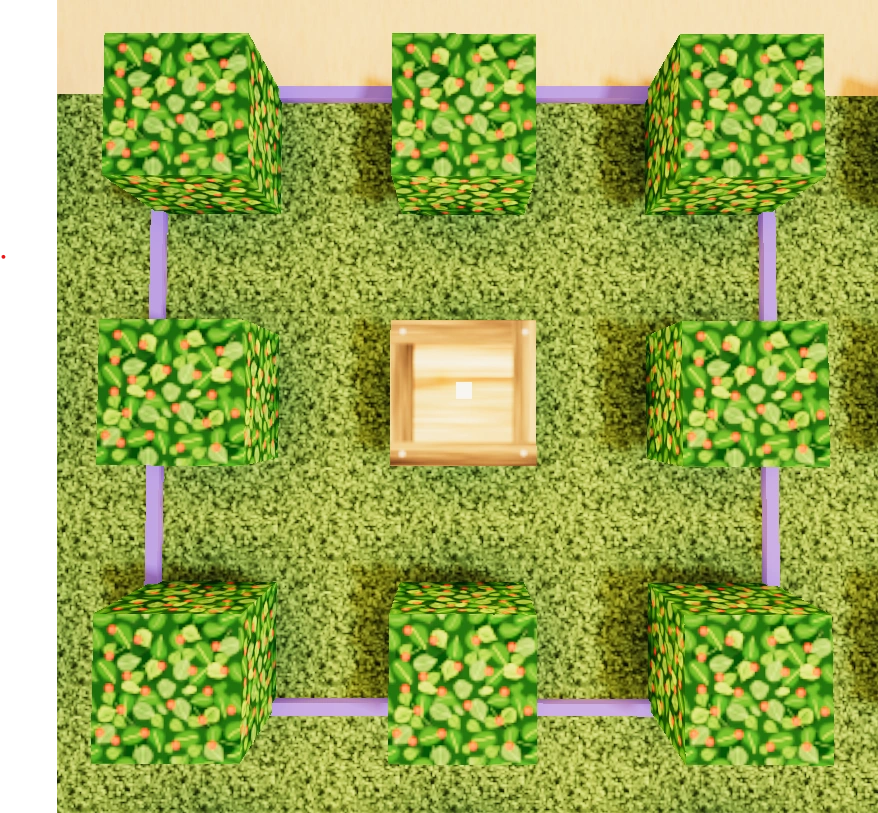
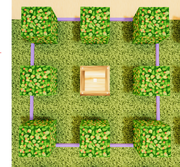
An example of a 5x5 berry farm with a chest in the center.
To place down an area you wish your colonist to work in, use a job block or open the command tool (The default hotkey of the command tool is the "1" key, and the icon for it is a golden crown). Left click to select a job you wish you place, and right click to place it. Most farming jobs require you to right click twice, once to start the area and once to finish it. The first food production you can use is berry farmers, which will produce berries worth a small amount of food each day. Berry farmers require no tools and will collect one berry every 8.5 seconds, collecting 6 total before placing them in a crate. Making a berry meal also requires 8.5 seconds and 8 berries. As such, the most efficient berry system to create roughly 50 meals every day is a 5x5 grid with the crate in the middle with 8 workers picking berries while 1 makes berry meals.
To change the focus of a berry worker, press 1 or scroll your mouse to the command tool. While looking at the berry farm, right click to open up the control window. Here you will find 5 limit groups and two sliders, one for berries and the other for berry meals. Keep the default (Limit Group 1) set to infinite berries on +++ priority. Click on Limit Group 2 and change the priority from +++ on berries to ++ and +++ on berry meals. again, this should tide your colony over for the first 50 or so colonists, giving you plenty of time to focus on other job blocks and expand your colony size to accommodate for the more advanced wheat farms.
Advanced Food[]
There of course are more ways to make food then mere berries. One of the first technologies to unlock is Wheat Farming. After unlocking this, you can make Wheat Gruel from 6 wheat at a Tinkerer's Table. This is a highly inefficient method of making meals, only making roughly 20 meals a day with stone tools, but can take pressure off of relying solely on berry farmers, who will quickly take up a lot of space. A single 10x10 wheat farm will produce 100 wheat every 2 days. The best way to efficiently produce wheat is to let the Wheat farmer plant all 100 crops. Once they leave after 19:00 game time, break half of their field, leaving 50 wheat left to grow to stage 2. The next day, they will be replanted, making it so that every day a farmer will plant 50 wheat then break 50 wheat. This allows for a steady supply of wheat for your Tinkerer, Primitive Cook, or Grinder.
The next level for food production is Wheat Porridge. This is created by a Primitive Cook at a Firepit and requires 3 wheat, a plank, and a pot of water, producing 1 Wheat Porridge and 1 empty pot. To get a pot of water, you first require a Potter, who works at a Pottery Station to make a pot. Once made, an empty pot has a 95% chance of also being returned, which can be refilled with water or flour. As such, when scaling up production for any product that uses potted goods, you often do not need to increase the amount of potters, only the amount of pots made in total, freeing up time for your potters to create Earthenware used to gain colony points at a Merchant's Hub. To fill the pots with water, you require a Water gatherer or a Waterpump. Water gatherers are far more efficient, producing 1 pot of water every 6 seconds. However, if there is no water source available, the waterpump will still work, producing 1 pot of water every 16 seconds. Neither requires tools or can speed up their time using them.
The most efficient use of wheat comes in the form of bread and bread meals. By this point, you should have access to bronze tools, so all estimations of rough production are based on use of bronze tools unless otherwise stated. Bread is made by a Cook at a Stove using a pot of flour, pot of water, and a piece of firewood every 20 seconds without tools, but can use up to steel tools to improve efficiency. A pot of flour is made by a Grinder at a Grindstone using no tools, making one pot of flour in 12.5 seconds using 3 wheat. If able to work throughout the day without a lack of supplies, a Cook can make roughly 130 bread. From here, you combine one bread with one berry meal to produce 3 bread meals in 48 seconds without tools, able to use up to steel tools. With constant supply, a single cook can make roughly 160-170 meals. For constant supply, you require - again assuming use of bronze tools - 1 bread cook, 16 berry producers, 2 berry meal makers, 1 woodcutter for firewood, 1 water gatherer (or 3 water pump workers), 2 grinders, at least 5 potters, 1 clay miner, and 4 wheat farmers (assuming you gain 50 wheat every day from every farm). This will produce 160-170 bread meals and a surplus of roughly 75 bread and roughly 50 berry meals capable of feeding 250-300 colonists. Total food production depends largely on the distance a colonist must travel to and from their work station for sleep, meals, and tools.
The last available meal in the game is the Chicken Meal. Once again, bronze tools will be assumed at jobs that can use them. The chicken meal is made by a Cook at a Stove in 60 seconds without tools, producing 3 meals for 10 cabbage, a raw chicken, and a firewood. Cabbage grows in two stages, with a Cabbage Farmer capable of harvesting up to 100 cabbages every day. A raw chicken is made by a Chicken Farmer every 30 seconds with 15 barley, with no ability to use tools. Barley also grows overnight in two stages, allowing for 100 barley harvested every day by a Barley Farmer. All three farms are placed using the command tool. At best, you can make 125-135 chicken meals everyday, requiring 3 chicken farmers, 6 barley farms, 5 cabbage farms, and 1 woodcutter. While considerably less meals and taking up more space, the benefit of chicken meals is that it requires less workers to produce enough food, typically consisting of 8-10% of your colony population, compared to bread meals, which consist of 12-15% of your population when scaled. Sacred Chicken Meals will also provide 2 sacred points on consumption compared to Sacred Bread Meals or Sacred Wheat Porridge, both of which only provide 1 sacred point on consumption.
There are an additional two lesser meals available to be made by the cooks should you choose to use them. This is the Cooked Fish and the Cooked Meat. Cooked fish can only be made by a Cook at a Stove, while cooked meat can be made starting with a Primitive Cook. However, cooked meat is made from animal carcasses requires the Local Animal Carcass research, which is not available until after unlocking the Iron Age. Before this, you can only gain animal carcasses by purchasing them at a Merchant's Hub for 5 points each. For the most part, cooked meat - base cook time of 35 seconds - is a good backup in case you begin to run out of other meals, allowing you to stockpile meals overtime. Raw meat will also be a byproduct as you harvest skin and leather for parchment (used for knowledge scrolls) and producing archers, so it's better cooked and stockpiled than left raw.
Cooked fish is another easy backup, requiring a Fisherman's Spot unlocked by the technology Cook. A raw fish takes 64 seconds to catch and 40 seconds to cook with no tools. On its own, cooked fish is not efficient, requiring a higher percentage of workers than bread meals. However, it is again never bad to have backups or add some flair to your coastline with a Fisherman on a dock.
Getting Your Bearings[]
At night, zombies will begin to advance towards your banner, intent on killing your colonists! It's time to hire some guards to keep your colonists safe! Of course, to provide your guards with ammunition you'll also need either artisans and miners or have to mine stone yourself and craft the ammo yourself! This is where the game starts to become a bit more difficult. You need to balance out your food production with the new colonists you're hiring to defend your colony, so you don't run out of food! Along the way you'll be able to unlock science that will make life easier all around! So go out, get acquainted with the jobs and build the colony of your dreams!
Troubleshooting[]
- A common bug with the crate system is that colonists pick the crate closest to them, including vertically. If there is a crate near your colonist but another even closer in a location your colonist cannot access it, your colonist may show that it can't find a path. To fix this, move it's own crate closer, or the interfering crate further away.
- This epiphany suggests that you think about making crafting stations, wheat fields, and the like as simply making jobs—not the workers to fill them.
- You can manipulate which jobs a citizen will work by using the Manage Jobs tab under the Colony tab, hotkey 'c'. This allows you to pick and choose how many people will be assigned to what jobs. However, if you want to move someone from working a specific job block to another one of the same kind, such as moving a miner from stone to copper, you must break the job blocks until they work at the correct one.
| |||||||||||||||||||